

About 1.5 years ago, I've written a tutorial on how to extract a subject in an image using green screen setup. Although it's fast and convenient, my favorite method to extract image is still using Layer Mask. So today I'll share how I usually extract image and change the backdrop by using Layer Mask in Photoshop.
Introduction
Layer Mask is one of the fundamental image manipulations tools in Photoshop. By adding a Layer Mask to your image layer, you can hide (or "erase") parts of the image and reveal the image layer beneath it. One thing I always said I like about Layer Mask is that it is non-destructive, which means you can recover the "erased" part of your image easily by applying the correct brush color.
If you're new to Photoshop and don't understand how it works, read on to discover this awesome Photoshop tool:
Step 1
The first step is of course set up your action figure/subject and snap the photo of it (youdontsay).
 |
| My latest haul, Shinkkochou Seihou SHF Masked Rider Decade |
Step 2
Next, load the photo into Photoshop:

The Background image is always locked, so you need to unlock it by double-clicking the lock of the Background and create a new layer out of it:

 |
| Click "OK" |
 |
| A new layer "Layer 0" is created |
Step 3
Now, create a Layer Mask for your image by clicking the "Add Layer Mask" button:

A (by default) white colored "Mask" will be created and tied to the image you selected just now:

Step 4
The next step is to select your Brush tool (by clicking the  button on your tool panel or press B button on your keyboard), and start painting your Mask.
Just a little info for those who are not familiar with Mask, the Mask area where you paint in black will be hidden, and the area you paint in white will be visible, see example below:


To make the image you extracted looks more "natural", I would suggest to use a harder/smaller brush on the sharp edges, and softer/bigger brush on the blurred edges:

Unlike the Eraser tool  , this technique is non-destructive to your image. So, even if you accidentally "erased" part of the image, you can recover that part easily by painting it white:

Anyway, continue painting the Mask until you get a satisfactory result:

Step 5
The final step is to drag and drop the suitable backdrop for your subject. To create a fake depth of field to the overall picture, I usually Gaussian-blurred the backdrop:


 |
| Adjust the blur-ness until you get a satisfactory result |

Bonus
While I'm at it, I'll also show how to make a glow-in-the-dark visors for Kamen Rider. To summarize, I'll create an Adjustment Layer to lower down the brightness of everything else except the visors. To keep the visors bright, I'll exclude the visors from the brightness adjustment by using the Layer Mask technique.
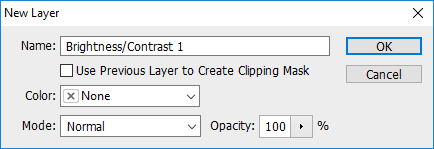
Picking up from where I left off previously, first I need to create a dark environment for the image, so I create a Brightness/Contrast Adjustment Layer by selecting it from the "New Adjustment Layer":
Picking up from where I left off previously, first I need to create a dark environment for the image, so I create a Brightness/Contrast Adjustment Layer by selecting it from the "New Adjustment Layer":

Then I set the brightness all the way to -150:

To make Decade's visors & DCD Driver "glow", I have to remove the Brightness Adjustment effect from those area. So, you guessed it right, I painted black on those areas on the Layer Mask. I also did the same thing for the windows in the background, so that it looks as if the moonlight is shining into the room. Besides that, I want the light shone on floor to remain dimmed but not too bright, so I painted gray color on those areas:

At this stage, we're pretty much done. The following steps are just for my personal preference, where I want to add the chilling night feel to the picture, so I added a Photo Filter Adjustment Layer and set the Filter to "Underwater":


Decade still looks kinda over-saturated to me, so I added a Hue/Saturation Adjustment Layer and lower down the saturation of Decade:


Final Product
Continue to play around with the parameters until you get the feel you want, and here's mine :D